Windows XP - CCBC modem setup
Step 1.
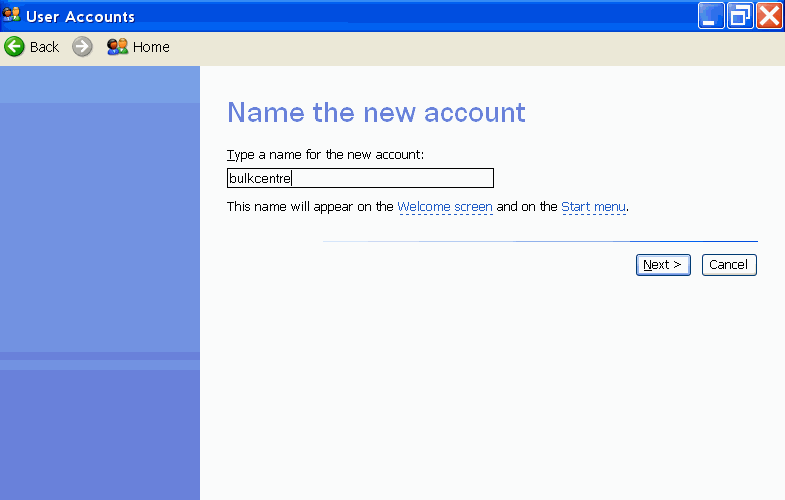
From the WindowsXP® control panel on the PC to be used, use User Accounts to create a new user profile that will be used when sending files to the Bulk Centre.The username and password are your choice.
Step 2.
From the WindowsXP® desktop, go to ‘Start', ‘Show All Connections’Double-click on the ‘Create a New Connection'.
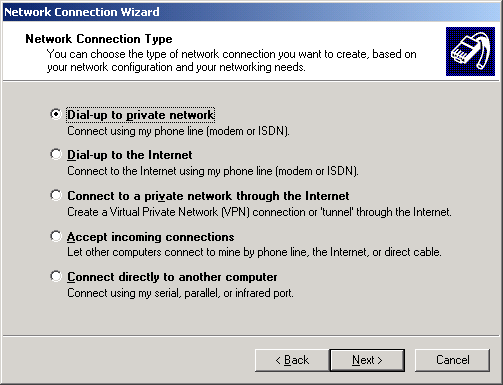
< click on Next with the mouse button >
Step 3
Type the ‘Phone Number to Dial'. This will be provided at an appropriate time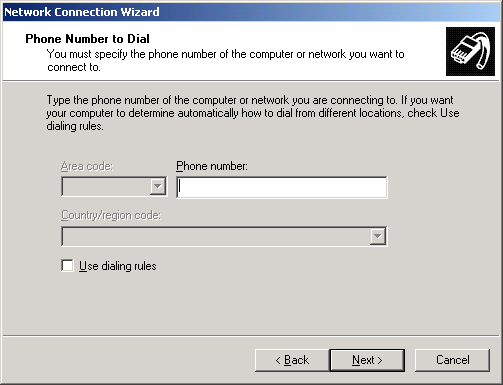
< click on Next with the mouse button >
Step 4.
Choose the ‘Connection Availability’ that is appropriate to your circumstances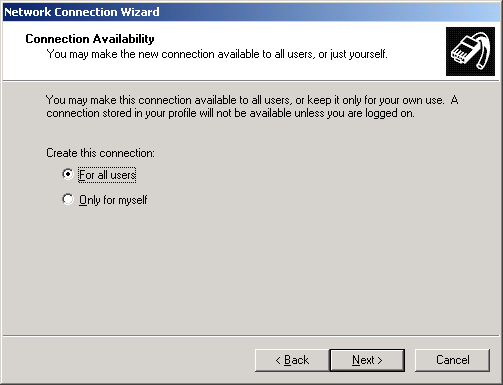
< click on Next with the mouse button >
Step 5.
‘Type the name you want to use for this connection’ – we suggest you call it 'cccis edi', and this name has been used in subsequent notes.Windows should already have your modem configured correctly.
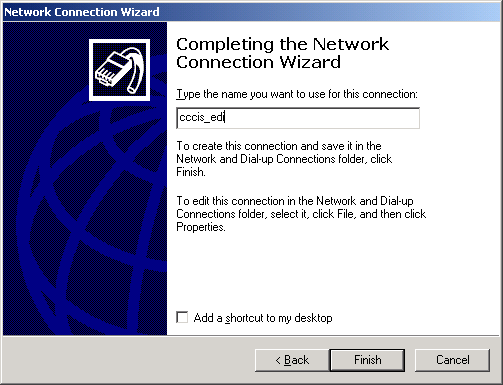
< click on Finish with the mouse button >
Step 6.
You will notice that a new icon has appeared within Network Connections called 'cccis edi'. The default properties of this connection should be adequate, but should be checked in order to make a successful connection. Right click on the 'cccis edi' icon and select 'Properties'.The ‘Options’ tab should have the ‘Include Windows logon domain’ unchecked
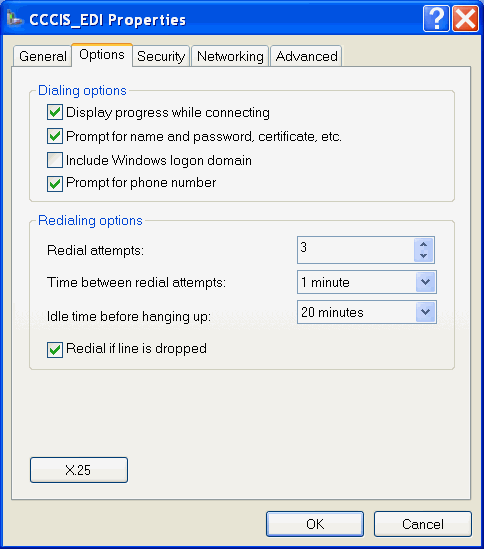
The ‘Networking’ tab allows access to see the TCP/IP properties.
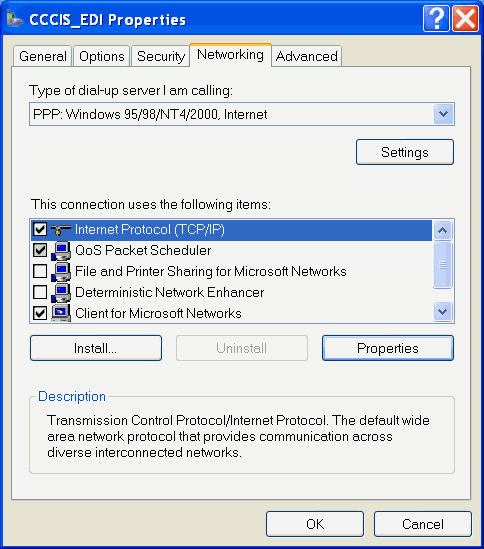
TCP/IP properties should be set to allow the ip address to be obtained automatically.
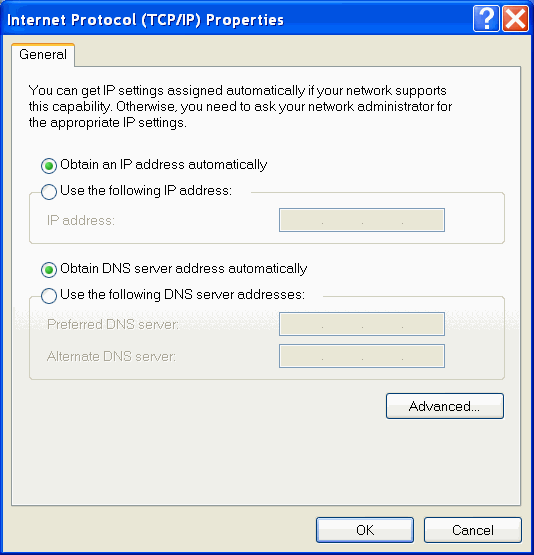
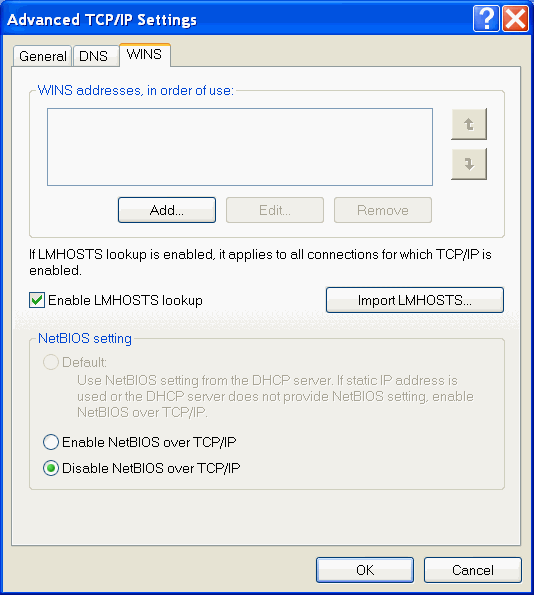
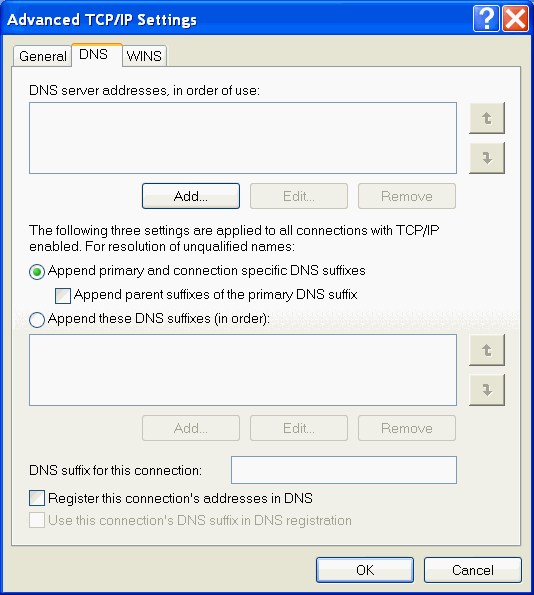
Click on the advanced tab to check the DNS & WINS settings.
Testing
On registering your interest in using the electronic service, a customer will be allocated a username and password for use during testing. This account will only be used by a single customer for the duration of its test activities.
The test script copies any zip files to an archive directory and unzips the relevant files contained within the zip file to another location ready for processing. The original copy of the zip file is then removed.
** It is preferable to submit files within a zip file. The scripts used for processing will ignore files not contained within a zip file **
A log file is also created detailing the actions taken so far. The EDS Operator has the flexibility to re-run this script via a desktop icon.
Step 1.
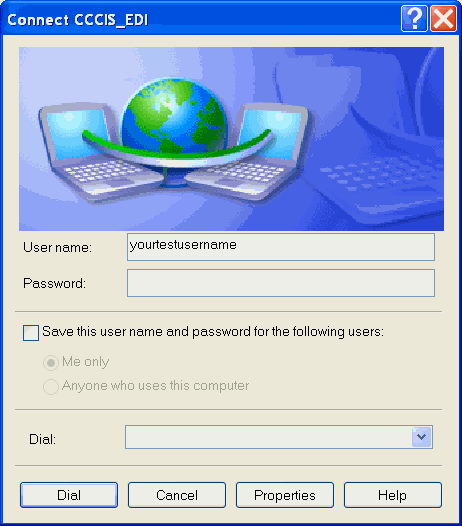
Double click on the ‘cccis edi’ dialup icon with your left mouse button. Enter the test Username and password supplied by EDS, the telephone number, and click ‘Connect’.The screenshot below shows the "connection" screen with a sample username. Each test customer will of course be assigned a unique test username.
Step 2.
Once you have connected to ‘cccis edi’ open Explorer and map a network drive. You only need to do this once if you check the ‘Reconnect at Logon’ box.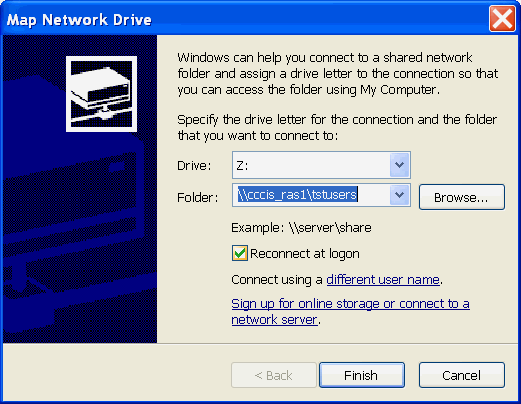
You may be prompted to enter your username & password again. Re enter if prompted.
Step 3.
You can now ‘Drag & Drop’ your ‘WinZip®’, data files to your test directory under \\cccis_ras1\tstusers. Note that your directory will be the same as your test username.Though this is the testing stage, it is good practice name the files in accordance with live procedures. It also eases the testing process. Please refer to Step 3 in the next section (Cutover To Live) for details.
Step 4.
Once these files have copied successfully disconnect your modem from the CCCIS EDI modem.
On completion of testing, you will be allocated a username and initial password by Bulk Centre Business to use the live system. The username will be based on your allocated creditor code. Other than the Username and the pathname for the mapped drive in Step 2, connection procedures are the same as those for testing.
Step 1.
Double click on the ‘cccis edi’ dialup icon with your left mouse button. Enter the Username and password supplied by EDS, the telephone number, and click ‘Connect’.Follow the same steps for when using your test account, except type in your live username, password that you will have been issued with.
Step 2.
Once you have connected to ‘cccis edi’, open Explorer and map a network drive. Ensure you enter the path \\cccis_ras1\users. You only need to do this once if you check the ‘Reconnect at Logon’ box.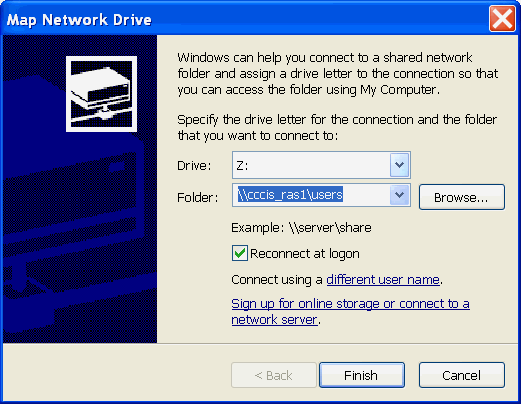
Step 3.
You can now ‘Drag & Drop’ your ‘WinZip®’, data files to your directory (or directories if you represent more than one customer code) under \\cccis_ras1\users. Note that your directory will be the same as your username.It is imperative that the format for the zipped files adhere to the following format:
<nnnn_0001.zip> (where nnnn relates to your customer code and 0001 relates to a notional sequence number starting from 0001 and incremented by one each day you send a zipped file.) This sequence number should not be confused with the media sequence numbers of the files contained within the Zip file, which are as defined in the appropriate Code of Practice or Rules of Membership. As an example, the zipped file nnnn_ 0001.zip may contain data files nnnnss.437, nnnnjg.527, nnnnwt.965 and nnnnpd.674 (where nnnn is your creditor code.
Step 4.
Once these files have copied successfully disconnect your modem from the CCCIS EDI modem.


